
Create a New Custom Field
From the Custom Fields Designer screen, select the 'NEW' icon. Click within each field (Source, Type, Width, Decimal, Required, Search, List, Minimum & Maximum) to edit.
Name : Enter in the Name for the field that will be displayed on the Card.
Source : The system will automatically generate the name for the Source once the field has been saved.
Type : Choose the Control Type that best suits the Custom Field. This works with the Control Sources selected on the Page Editor page.
C – Character (Use with: Text or List box Control Sources.) 254 alpha/numeric character limit
D – Date (Use with: Date/Calendar box Control Source.)
L – Logical* (Use with: Yes or No, checkbox Control Source.)
M – Memo (Use with: Edit box Control Source) Similar to text box with no character limit. This field type is not available in the Custom Export Module.
N – Numeric (Use with: Text Box Control Source) 254 numeric character limit, can define decimal spacing.
V – Rich Text Format (Use with: Edit Box Control Source) No character limit and save multiple text formats. This field type is not available in the Custom Export Module.
Width : Set the character width limit within the Custom Field. Example: For “Alarm Code”, the number of characters will never exceed 10, the character Width would be set at “10”.
Decimal : Set the decimal spacing (for use with numeric type fields, standard is 2 and displays as “0.00”)
Required : Indicates the Custom Field is mandatory. Ensures the Reservationist cannot save or exit the screen without addressing the field.
Search : Indicates the Custom Field is searchable. Using the Search feature on a Reservation Custom Field will allow a User to search for the contents of the Custom Field in the Reservation search screen. This is a great way to search for a Reservation number or an invoice number from a different version of Oscar or another Reservation application. Memo fields cannot be made searchable.
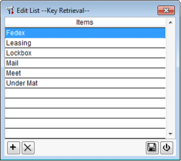
List : The List option establishes the Custom Field as a List Box. Populate the List check box and click Save  on the Custom Fields Setup Screen. After exiting the Custom Fields Setup screen, return and click on the drop-down arrow to enter the list items that pertain to the field that has just been created. The List option is used only with a character type field.
Add List Item : Click  to add more list items. After completing entry of all list items, User must save and then quit Custom Fields Setup completely before creating another list box Custom Field. Choose to save the list.
Edit List Item : Select a list item. Overstrike to change the text. Choose to save the list.
Delete List Item : Select the List item to delete. After selection, click  . This will remove the list item. Choose to save the list.
Minimum : Use to indicate the minimum number allowed for the field (for use with numeric type Custom Fields). Example: “1” = 1.00. Used only with numeric type
Maximum : Use to indicate the maximum number allowed for the field (for use with numeric type Custom Fields) Example: “104” = 104.00. Used only with numeric type
Click  to add additional Custom Fields.
When finished creating the field descriptions in Custom Fields Designer, click “Save”, which will close the Custom Fields Setup screen.