
Lead Record
Billing Info
Corporate Client
Select a Corporate Client, saved in Settings/Corporate Clients. Selecting a Corporate Client automatically populates the Billing Name, etc. into the Reservation, preferences for Batch Invoicing by Corporate Client, A/R Report by Corporate Client, Statements by Corporate Client, as well as many Reservation dynamic custom fields that were saved in the Corporate Client record.
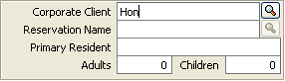
The first few characters of the Corporate Client ID may be typed in the Corporate Client field, upon tabbing out of the field, the Corporate Client search screen will be opened, populated with the characters entered. If the complete Corporate Client ID is entered, the search screen will not open and the remainder of the Corporate Client details will auto populate on the Lead.
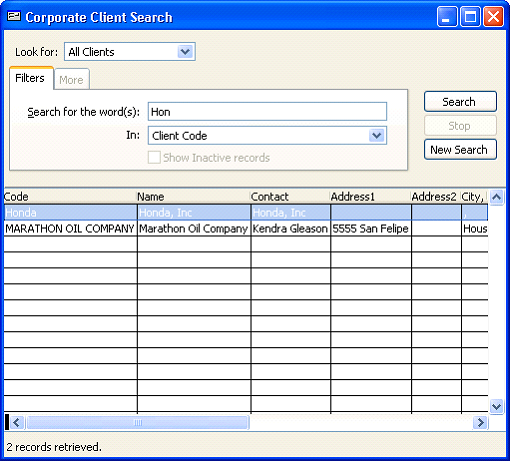
Search for the word(s):
Type in a complete or partial Corporate Client ID, Name, Contact Name, Address or phone.
In:
Select which field Oscar should search for based on the entered information. Select from; Client name, Client Code, Contact Name, Client Address or Client Phone.
Click  .
.
If the database contains a large amount of Corporate Clients, the  option may be selected at any time during the search to stop searching and allow selection of a Corporate Client.
Select  to erase any previously entered search fields.
Once the Corporate Client data is returned, click on a header to sort by this column.
Once the Corporate Client has been found, double click on Corporate Client record to insert it into the Lead screen.
Reservation Name
This will auto-populate with the Corporate Client Contact’s information. Select a different Contact if necessary. If not using a Corporate Client, enter the Reservation name.
Primary Resident
Enter the guest name. This field must be populated in order to save the lead.
If “Separate Guest Name (First and Last)” is enabled in Program Settings, Pg. 100 enter the Guests first and last name in the fields provided.
Adults/Children
Enter the applicable number of guests staying in the Unit.
Source
Select a Source (Saved in Settings/Program Settings/Source Setup).
Sales Rep
Select the in-house sales rep (Saved in Settings/Program Settings/Commission Agents) – used for operations reports only. User must be indicated as a sales rep in Settings/Users.
Status
Reservation Status Indicators – Colors to view and sort Schedule Board. Select the Status of the Reservation. (Saved in Settings/Schedule/Reservation Indicators). For New Reservations, the system defaults to the first status saved in Settings.
Res Type
System default = [Standard Stay] Reservations booked with “Default” Reservation Type will look to the “Revenue Post To” account from the Unit record. Select a different Reservation type to override [Default] if applicable. (Saved in Settings/Program Settings/Reservation Types). Rent revenue is posted from this field.
General Tab
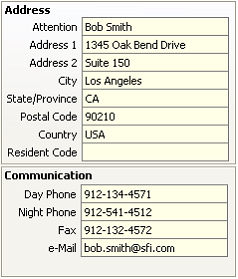
Billing Name/Address
Enter the rent responsible name and billing address. This name and address will post to the first resident ledger. If using Corporate Client, this will auto-populate with the Corporate Client’s information.
If the address changed after booking Reservation, the change must be manually entered in the Billing Address section of the Resident Ledger as well.
Resident Code
(Optional) Enter in a resident code. This field can be used as a carry-over from previous software or can be used for Insurance ID#, PO# or Job code.
Communication
Enter contact telephone numbers, fax number, and e-mail addresses. If using Corporate Client, this will auto-populate with the Corporate Client’s information.

Arrival Date
Resident’s Move-In Date. Default is System Date.
Arrival/Departure Times
(Saved in Settings/Market/Reservation Defaults). Manually change here if necessary.
Departure Date
Resident’s Move-Out Date. Default is System Date plus one day.
Length of Stay
After the Arrival Date is entered, this control may be used to automatically adjust the Departure Date X number of days after the Arrival Date.
Bill From
Invoice the resident from this date regardless of the Arrival Date. (Default Setting)
Functionality: This is used to maximize billing.
Bill To
Invoice the resident to this date regardless of the Departure Date. (Default Setting) Program Settings/Financial/Resident Ledger Settings
Original Contract
Resident’s original Move-Out date.
Notice Days
Enter the contracted number of days required for the resident to give notice to vacate. Facilitates reporting on Resident Lease Expiration Report for “Date Notice Required”.
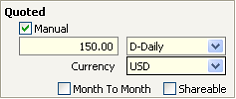
Quoted Rate
If using the Rent Builder or Default Rate, leave the Manual box unchecked so the rate will auto-populate in the Reservation.
Manual
Check to enter a manual rate and enter the amount of Rent only. A Rate is not required at this time. The Rate may be entered once the Lead is booked and becomes a Reservation. To enter a Manual Rate, the Manual checkbox must be populated.
If using Rent Builder or Default Rate, a “manual” rate may be entered. The manual amount will override the Rent Builder or Default Rate amount.
For Markets that use the Default Rate, the default rate should be populated in ALL Units. At the booking process the User should not check the box.
The logic for the unpopulated manual rate indicator is as follows:
1. First, looks to see if the Unit Rent Builder option is enabled; if yes, whatever rate exists, even a 00.00 rate, will populate in the resident ledger rent rate field
2. Second, if the Unit Rent builder option is NOT enabled, looks to the Unit Default Rate field; whatever rate exists, even a 00.00 rate, will populate in the resident ledger rent rate field
Type
System default will auto populate. When quoting a different Rate Type, change if applicable. Setup in Markets Default Billing Frequency page 87.
Currency
Used with the Currency Module, this will auto populate with the Database default currency. If a Corporate Client record is selected that contains a default Currency, this will auto populate. Change to the quoted Currency for the Resident Ledger if required.
Month-to-Month (M-T-M)
Indicates the Resident is on a month-to-month rental basis. This indicator works with the automated Month-to-Month Reservation Extension routine which extends M-T-M Reservations through a batch process. See page 284 for Month-to-Month Reservations.
Shareable
Indicates the Reservation is shareable. This filter assists with availability search for Shareable Units on the Schedule board.
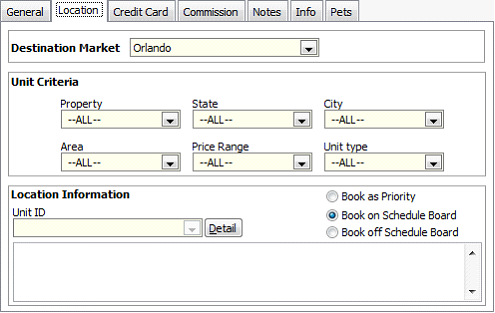
Location Tab
Destination Market
This function allows the Reservationist to assign a lead to a Market without having to choose a specific Unit.The Destination Market will Default to the User’s default Market. Once a Unit is chosen on the lead, the destination Market field will update with the Units’ location Market.
The Destination Market saved on a lead allows each Market the ability to assign a lead to another Market (Cross-Market Leads). Each Market can then run a Lead Report filtered by their Market and get updated leads that have been assigned to them for follow-up and booking.
Unit Criteria
Select some or all of the filters, to narrow down the Unit selections. The Property filter will not save on the lead.
To clear a filter use “delete” key.
Unit ID
Click on the drop-down arrow and the Units that meet the criteria selected will appear. Click on the desired Unit ID. Click  to view the selected Unit.
Book as Priority
To book this Lead as a Priority Reservation, populate this indicator. To use this option, the Destination Market, Property and Unit Type must all be selected.
Book Type
This indicator will default to the “Default Booking Action” in Program Settings, page 99. Select “Book on Schedule Board” for visual booking or “Book off Schedule Board to book without being taken to the Schedule Board.
More Options without selecting a Unit
The Lead may be booked without selecting a specific Unit; however, a Market must be selected in order to book visually on the schedule board. After saving, click “Book” and all of the available Units that fit the Unit Criteria will be populated at the top of the Schedule Board. This allows the User to view Unit Statuses that may be populated on the Schedule Board.
The Lead may be saved without selecting a Unit and later retrieved by performing a Reservation Search.
To search for a Lead, go to Reservations, Search, then enter any criteria available. If no criteria is available, search by selecting “Leads’, and then select a Market or User Name.
For cross-Market leads, at a minimum, select the “Destination Market” and any known Unit Criteria, such as Unit Type.
Credit Card
For guests who are paying with a credit card, fill in the following details. Requirements to save the record include the expiration date and cardholders first and last names. Credit card numbers are masked upon save. To view the credit card number after the Lead has been saved, click  . View rights must be granted in Settings/Security Profiles/Accounting/Credit Cards. See Credit Cards on pages 452 through 495 for complete Credit Card Processing.
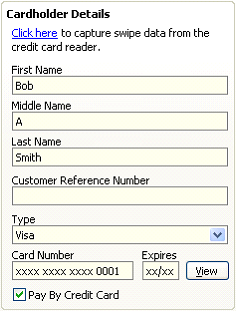
Click Here
For companies that have a Credit Card swipe, click here to record Credit Card swipe data.
Name
Complete the First, Middle and Last name as it appears on the card. Do not enter apostrophes in these fields!
Customer Reference Number
Visa/Master Card level 2 data. If the Credit Card being entered requires this, the Cardholder will know this information.
Type of Credit Card
This will automatically populate from the Card Number.
Card number
Type the Credit Card number in this spot. Credit Card authentication is embedded in the software. An incorrect number cannot be saved. Requirements to save the record also include the expiration date and cardholders first and last names.
Pay by Credit Card
For guests who are paying with a credit card, check the Pay By Credit Card box. This check mark will cause specific required information to print on the A/R List Report and is a key element for the Oscar Credit Card processing software. Do not check this box if the Credit Card is being held in lieu of a security deposit.
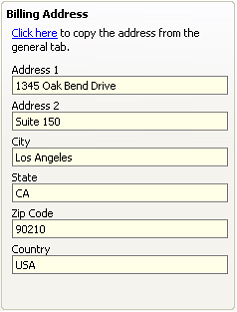
Click Here
This will automatically copy the address from the General tab, for the Credit Card billing address.
Billing Address
This is the Billing Address that the credit card is billed to.
Frequent Scenarios
Scenario 1:
Company is paying for rent by credit card, resident is paying for incidentals by credit card – DO check Pay By Credit Card and include the company’s credit card information. When the Reservation is booked, create a separate ledger for the resident and include his credit card information in his Resident Ledger – DO check Pay By Credit Card and include his credit card information.
Scenario 2:
Company is paying for all expenses by credit card – DO check Pay By Credit Card and include the company’s credit card information.
Scenario 3:
Company is paying for rent by check, resident is paying for incidentals by credit card - Do NOT check Pay By Credit Card - wait until the Reservation is booked then create a separate ledger for the resident and include his credit card information in his Resident Ledger.
Scenario 4:
Company is paying for all expenses by check, money order or bank transfer, however the Credit Card detail is kept in lieu of a cash deposit for damages, etc. – Do NOT populate Pay By Credit Card, but fill in the credit card information.
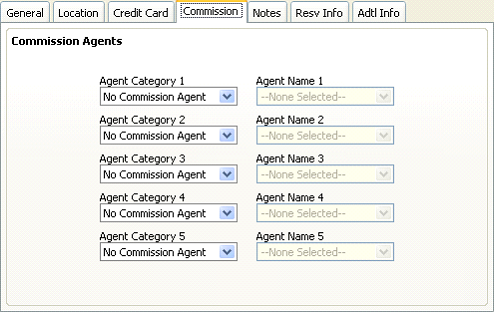
Commission Agents
Using the drop-down arrows, select the appropriate commission agents. The system will allow more than one Commission Agent Type to be selected per Reservation. Agent Types are saved in Settings/Program Settings/Commission Agents. Commission Agents are saved as Vendors with the appropriate Agent Type selected in the Vendor Type field.
Do not inactivate Commission Agent Vendors. This unlinks the Vendor from any drop down menus.
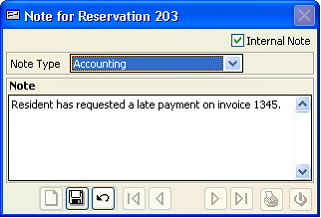
Notes Tab
Add a note,
Click  . At the “Create a New Record?” prompt, select “Yes”. Select Note Type, enter note and click
  to save the Note.
Edit a note
Double click on the note in the Notes List. Click  and make changes. Click to save the Record. Click
  to close the Note screen.
Delete a note
Double click on the note in the Notes List. Click  to delete the Note. Click to close the Note screen.
Internal Note
This feature is found in Leads and Reservations only. The User can indicate if a note is Internal (“Office use only”) or External. Notes can be included and printed on some operations reports.
** A/R Aging Report – option is available to Print the A/R Aging Report with Residential Financial Notes.
To save the Lead, click  .
.