
Create a Manual ACH Consent
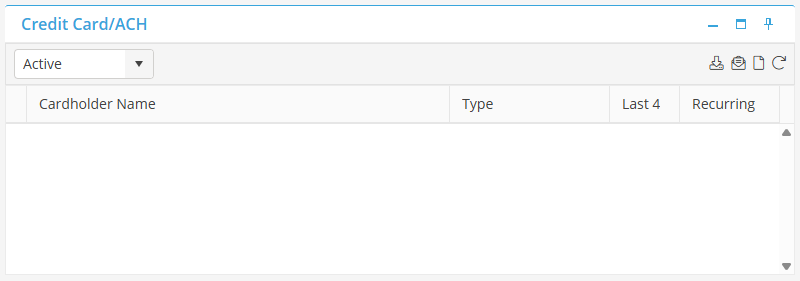
To manually enter an ACH Consent, navigate to the Credit Card/ACH Card from a Tenant Record. Click  .
.
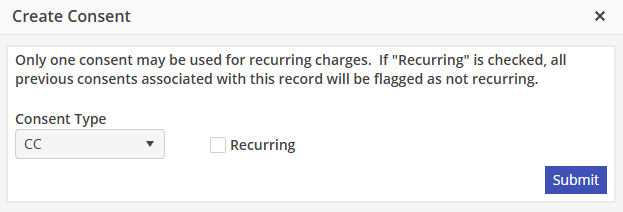
Select ACH on the Consent Type drop down.
The “Add ACH” Widget will appear. The only field that is verified when creating the ACH Consent is the Routing Number. Therefore, it is important that all fields be entered as accurately as possible. If incorrect information is entered, this could cause the ACH postings to be returned, lengthening the time to deposit.
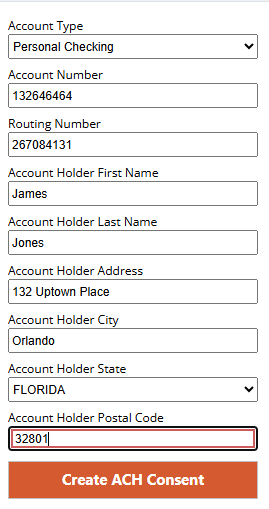
Account Type - Choose the Account Type associated with the bank account. Select from Personal Checking, Personal Savings, Business Checking, or Business Savings.
Account Number - Enter the Account Number.
Routing Number - Enter the Routing Number.
Account Holder First Name - Enter the account holders first name.
Account Holder Last Name - Enter the account holders last name.
Account Holder Address - Enter the address that is associated with the account.
Account Holder City - Enter the city that is associated with the account.
Account Holder State - Select the state that is associated with the account.
Account Holder Postal Code - Enter the postal code associated with the account.
Recurring ACH Consent - If this Consent will be used for all future payments, populate the “Set as recurring ACH” indicator. If this is not populated now, it may be populated in the future from the Consent screen.
Select  to create the Consent.
The ACH Consent will now show on the Credit Card / ACH Card on the Tenant Record.
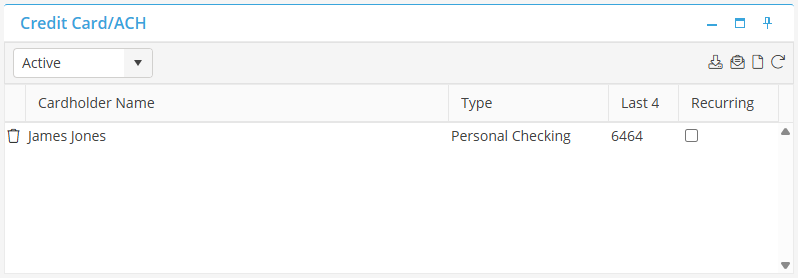
The ACH Consent may be marked as recurring or non-recurring now by selecting or UN-selecting the Recurring indicator. Only one Consent may be marked as recurring at a time.
Please note: The ACH Consent Widget does not perform a pre-authorization to verify account details, as is done with a Credit Card Consent.